Roles & Permissions
Manage access and permissions of your users and members in your store. The entire system of roles and permissions in Shopper is implemented by the package spatie/laravel-permission. Because all permissions will be registered on Laravel's gate, you can test if a user has a permission with Laravel's default can() function.
To access dashboard, you need to have the role administrator this role can be found in the configuration file config/shopper/core.php.
After creating a super admin we get the following result
After logged as an admin, you can add members with permissions on your staff to log in to your store and complete tasks like Adding products or managing Orders and use roles to control what sections of your store they can access.
Permissions help you manage what your store’s staff can do in your admin. Roles let you delegate, and assign the level of access that your staff needs to do their jobs effectively.
Permissions are associated with roles. Depending on the role that a member has, you can assign different types of permissions to it to limit or increase the actions they can do.
All this management of roles and permissions is done using the Laravel Permission package from Spatie.
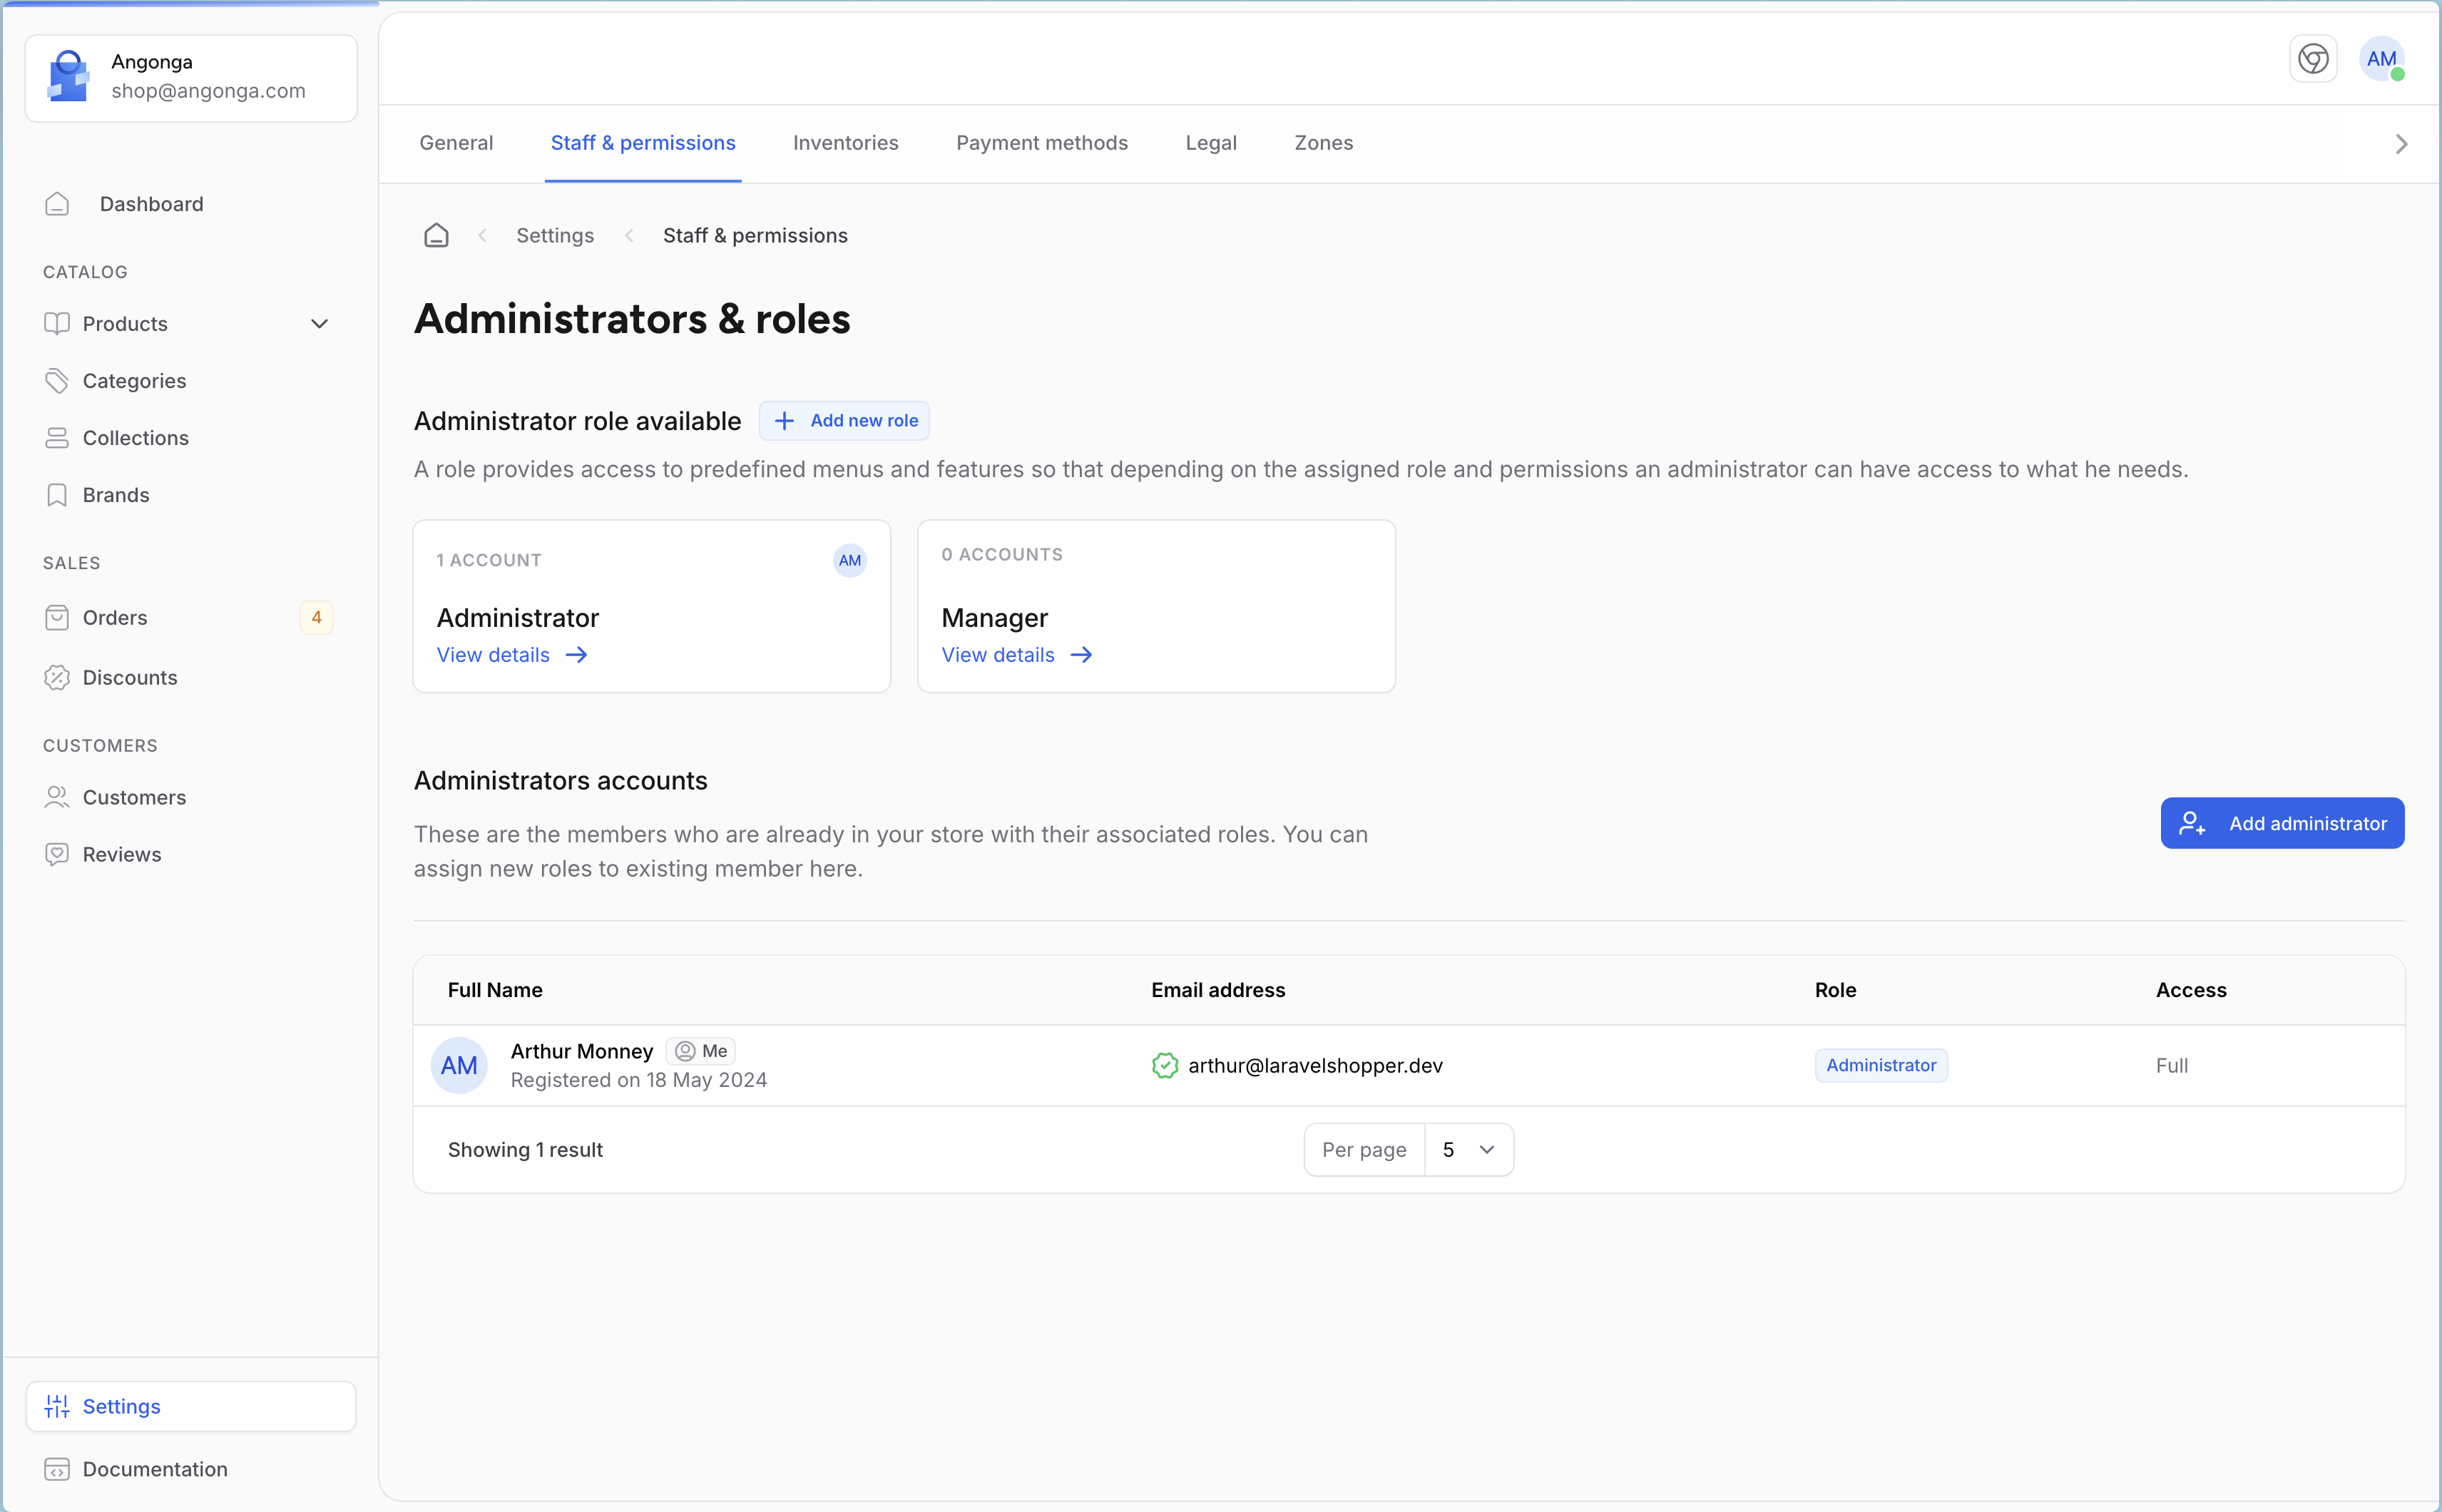
At installation Laravel Shopper comes with 3 roles: Administrator, Manager and User, the user role cannot be modified from the administration interface because it is the role that will be assigned to any customer who will create his account on your shop.
RBAC ACL
RBAC (Role Based Access Control) or ACL (Access Control Layer) is an approach to restricting system access for users using roles system, Laravel Shopper allow to define the level of access for each user. With roles a user can access menus, pages. It is important to know that one Administrator can have multiple roles assigned.
To view the roles and permissions management page, you must go to the Settings > Staff & Permissions
Model
The model used for the Role is Shopper\Core\Models\Role this model extend from the Spatie Role model.
| Name | Type | Required | Notes |
|---|---|---|---|
id |
autoinc | auto | |
name |
string | yes | Role name in lowercase such as an slug (Eg.: author) |
guard_name |
string | no | This field is automatically filled in by Spatie |
display_name |
string | no | Nullable, the readable name for the role (Eg.: Blog Author) |
description |
text | no | Nullable, the role description |
can_be_removed |
boolean | no | Default true, defines if a role can be deleted. |
And the Permission model is Shopper\Core\Models\Permission
| Name | Type | Required | Notes |
|---|---|---|---|
id |
autoinc | auto | |
name |
string | yes | Permission name in lowercase such as an slug (Eg.: create_post) |
guard_name |
string | no | This field is automatically filled in by Spatie |
group_name |
string | no | Permissions can be grouped into groups to better organize them. |
display_name |
string | no | Nullable, the readable name for the permission (Eg.: Create Post) |
description |
text | no | Nullable, the permission description |
can_be_removed |
boolean | no | Default true, defines if a permission can be deleted. |
The Permission model has some groups as shown here
Components
During the installation of Laravel Shopper, no component files are published by default to ensure a streamlined and hassle-free setup. However, if you need to customize or replace any components, you can easily publish them using the following Artisan command:
A new setting.php file will be created in the config/shopper/components folder.
Manage Roles
A Role is a set of permissions to perform certain operations within the system, which is assigned to a chosen Administrator. As said previously Shopper at installation comes with 3 roles but 2 are accessible in the administration panel. The user role does not appear, modifying it could lead to bugs on your store so it is not listed here.
Add role
To add a new role, you must click on Add a new role button. Required fields are marked with asterisks
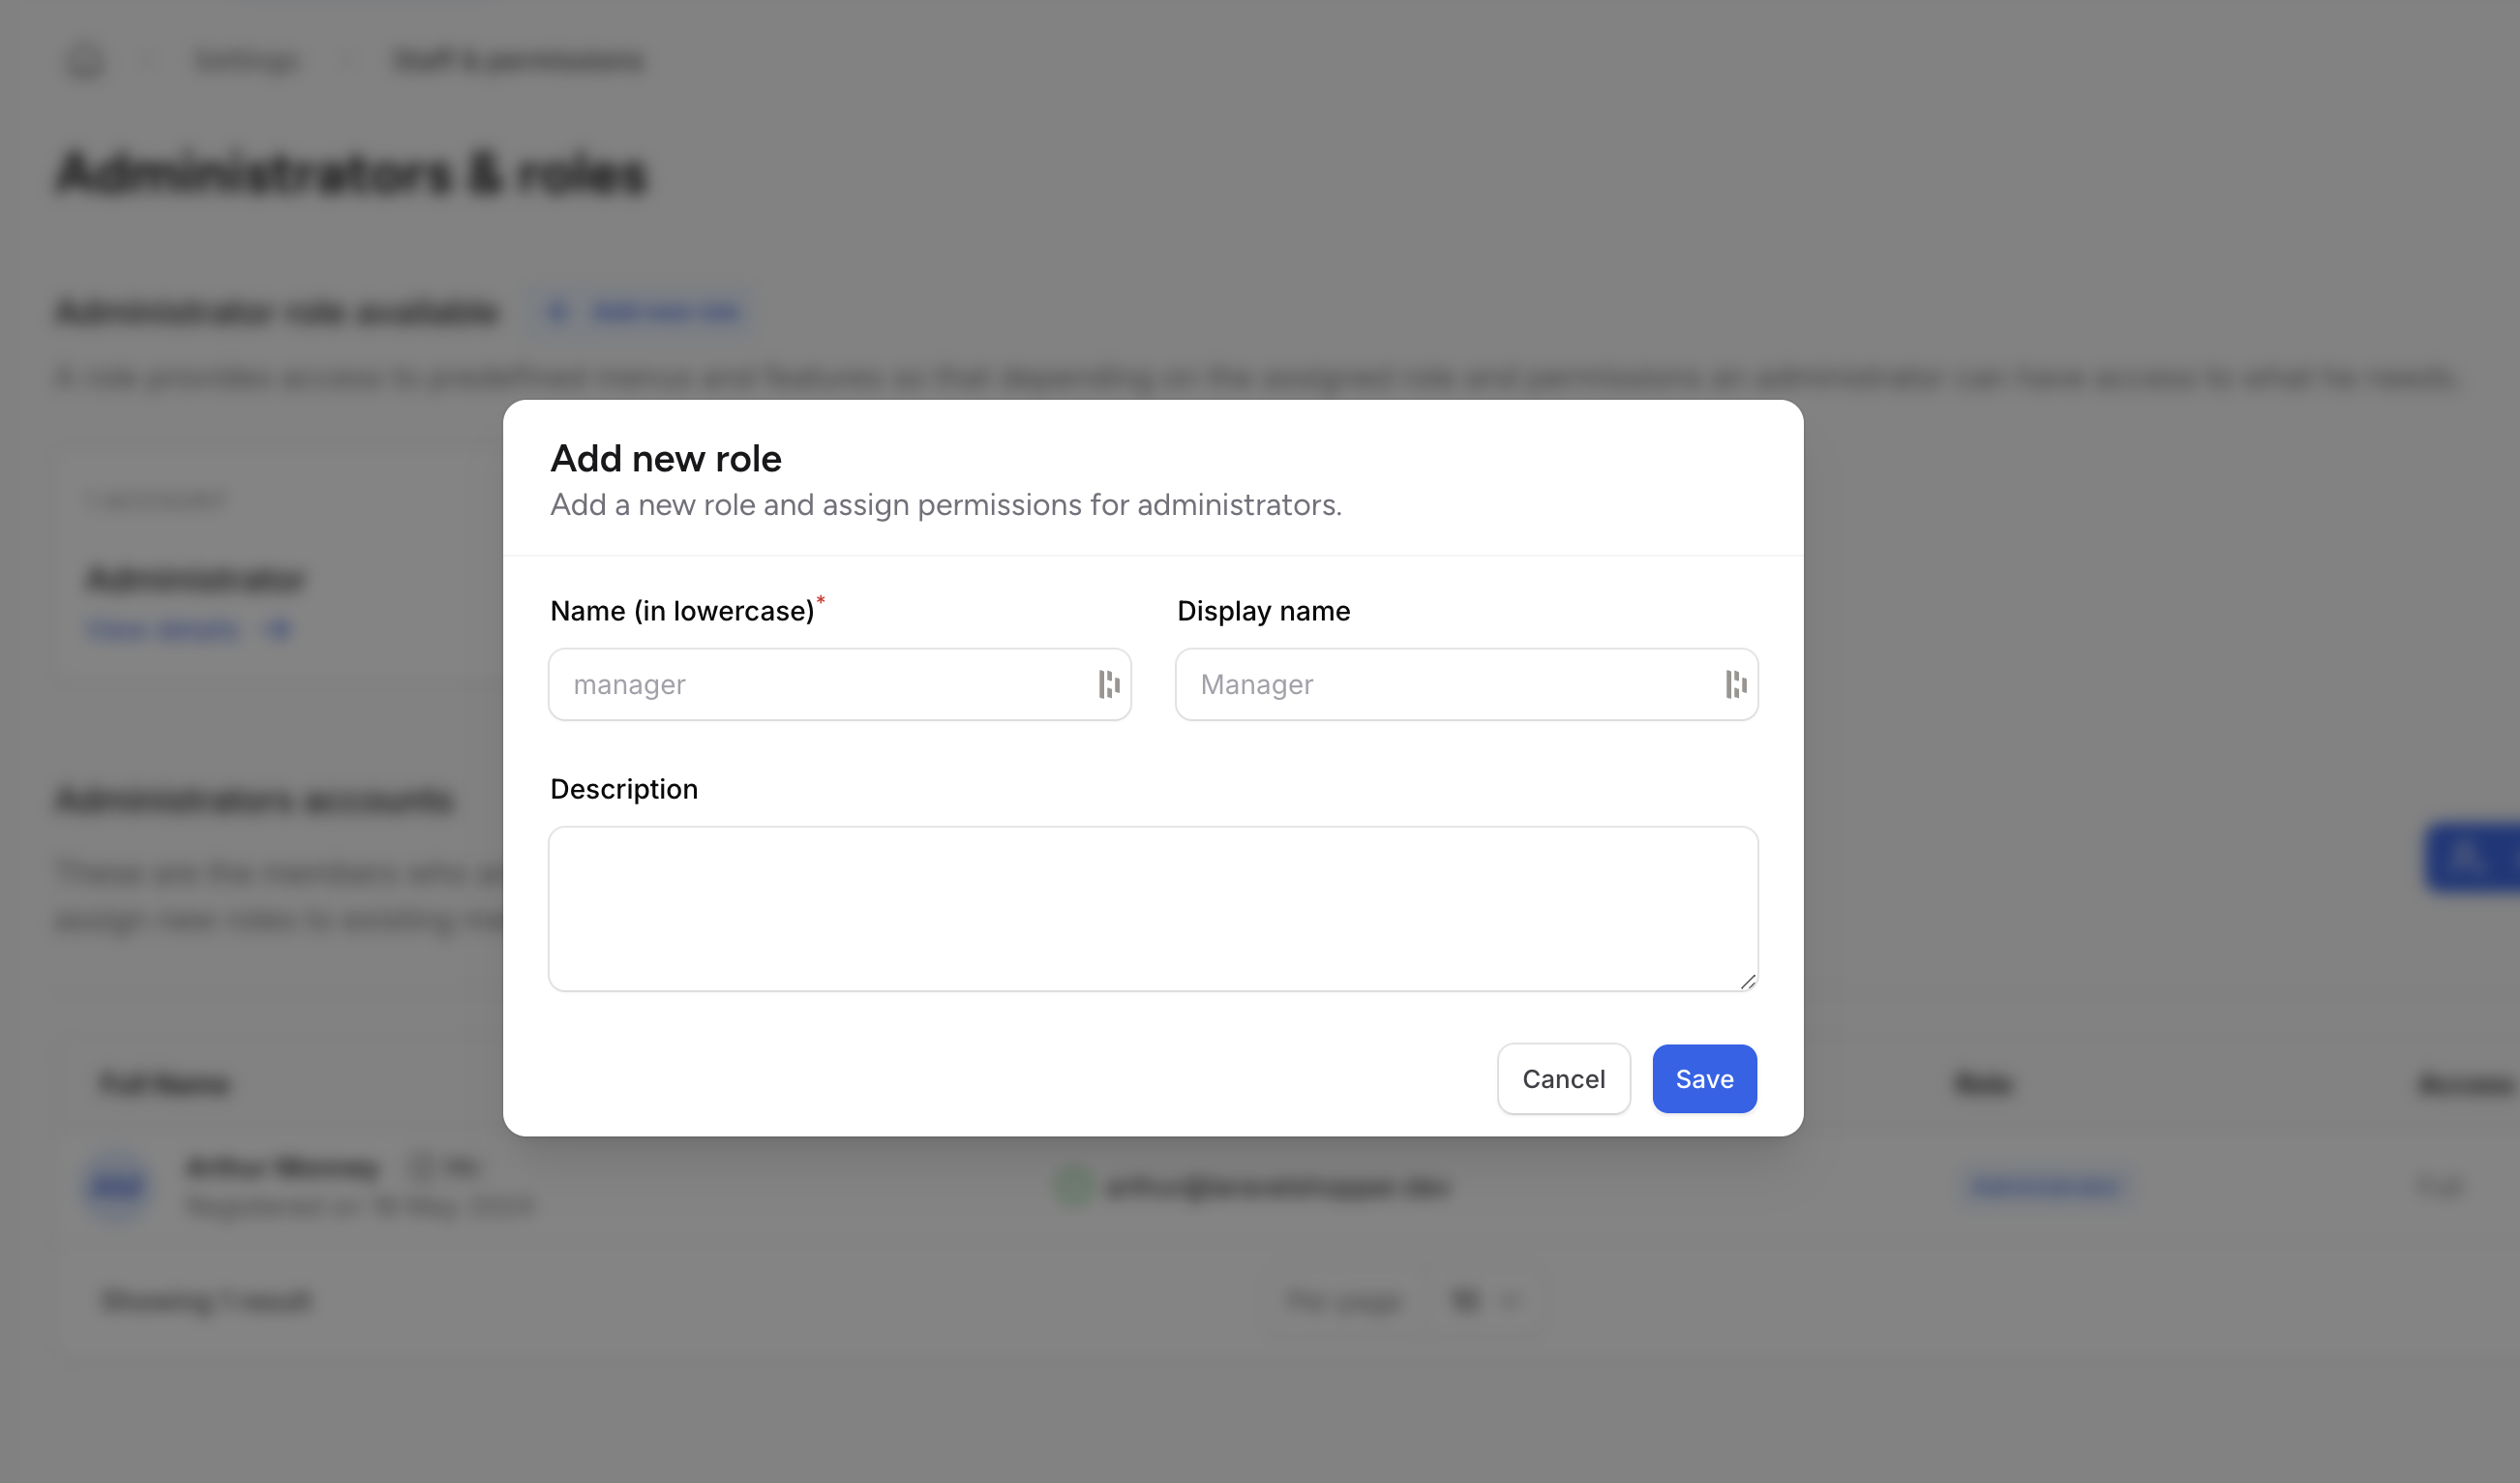
The added roles can be used later in your code to assign functionality or access resources.
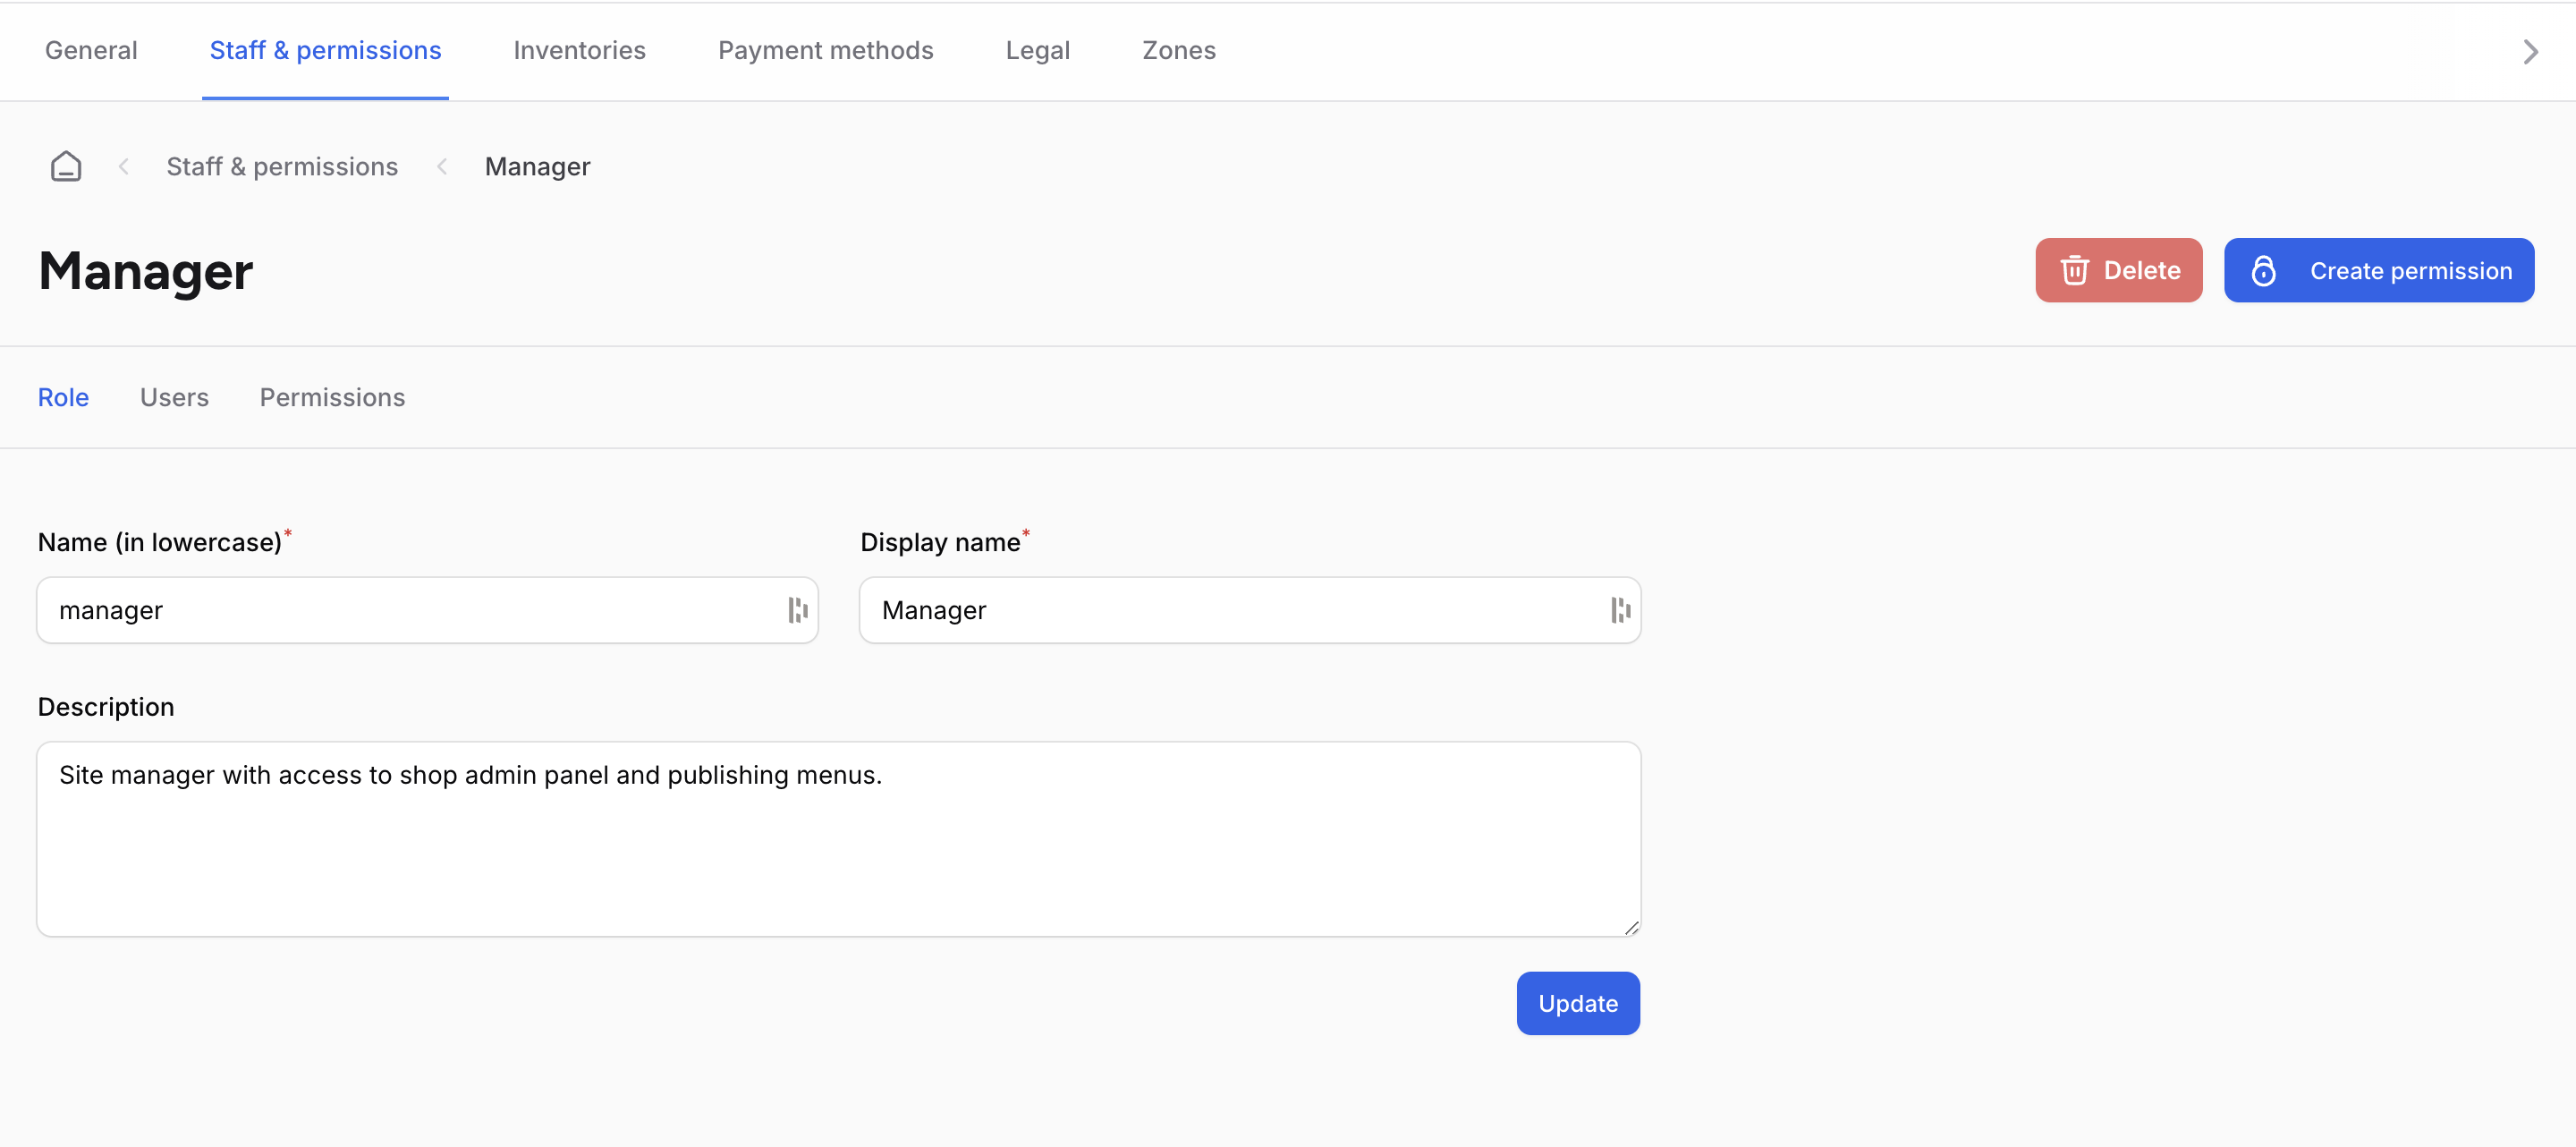
Update role
To modify a role you must click on the role you want to modify to access the edit form.
And as already mentioned, all Shopper features are livewire components. So you can change everything at any time to fit your store.
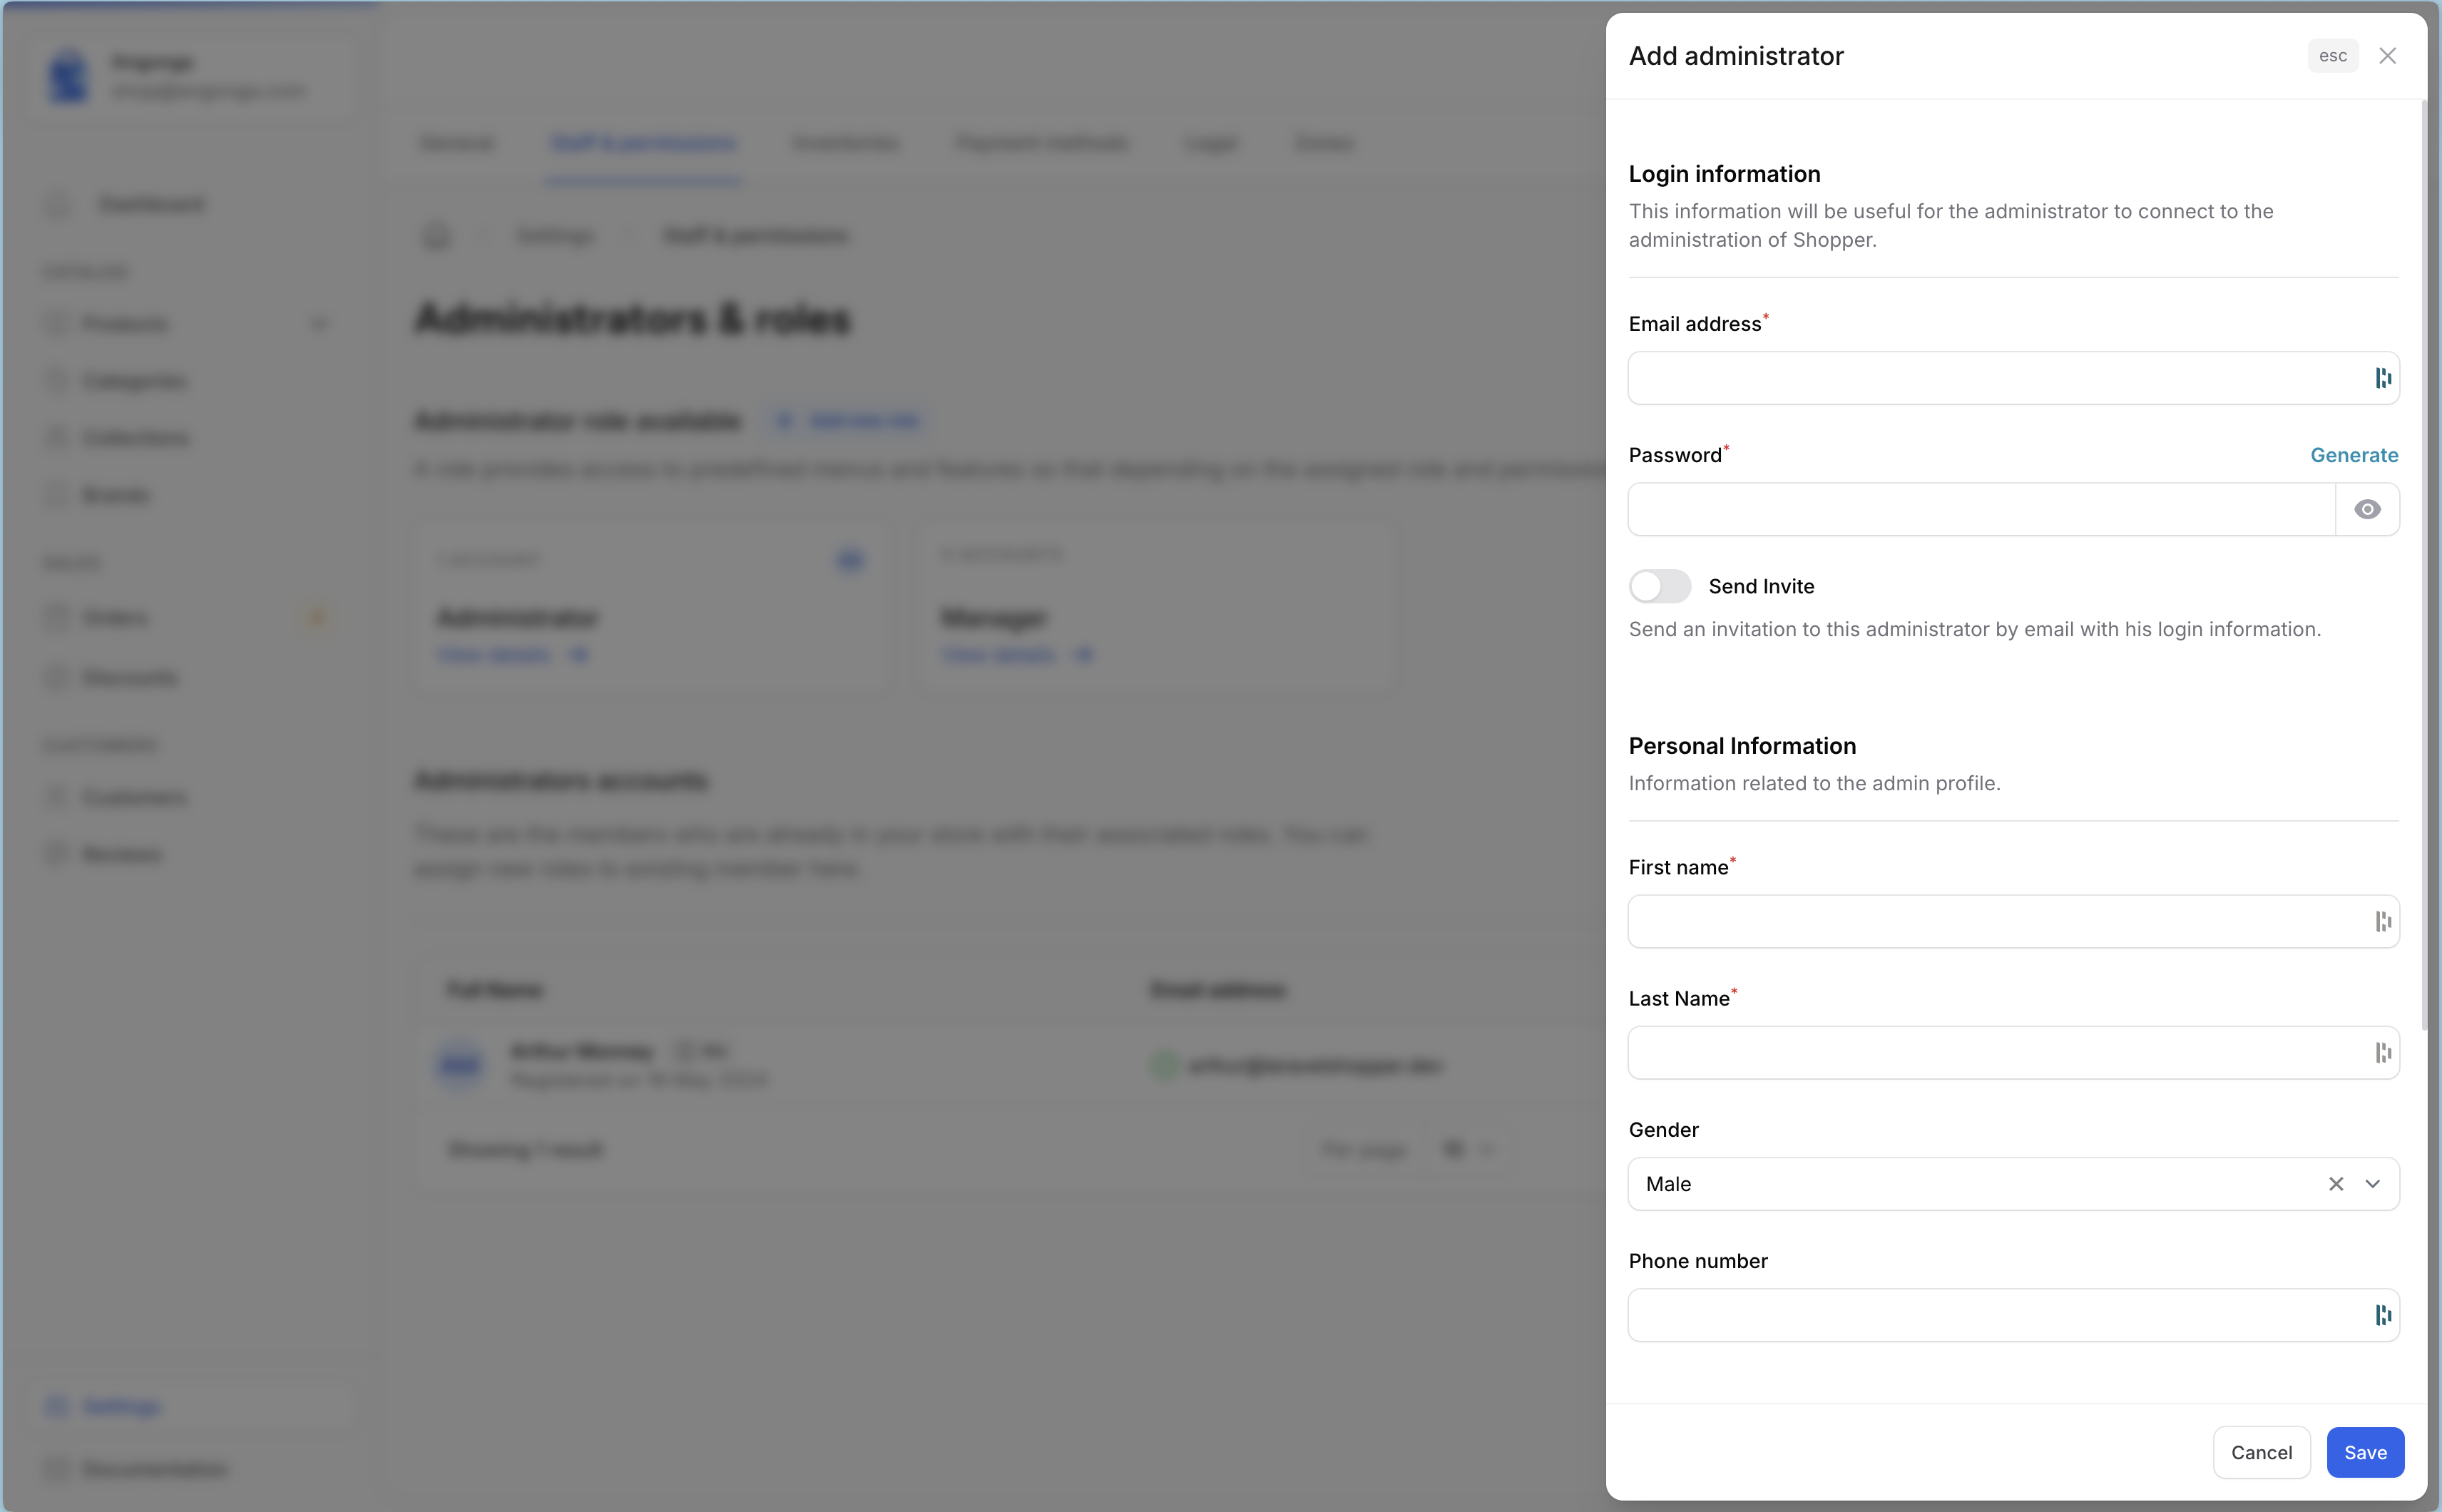
Create admin
In addition to creating an administrator from the command line you can also do it from the Shopper interface, you just need to click on Add Administrator button. Then you fill in the information of your administrator with the role chosen for him
The actual role registration function looks like the code below. And the whole implementation class is Shopper\Livewire\SlideOvers\CreateTeamMember
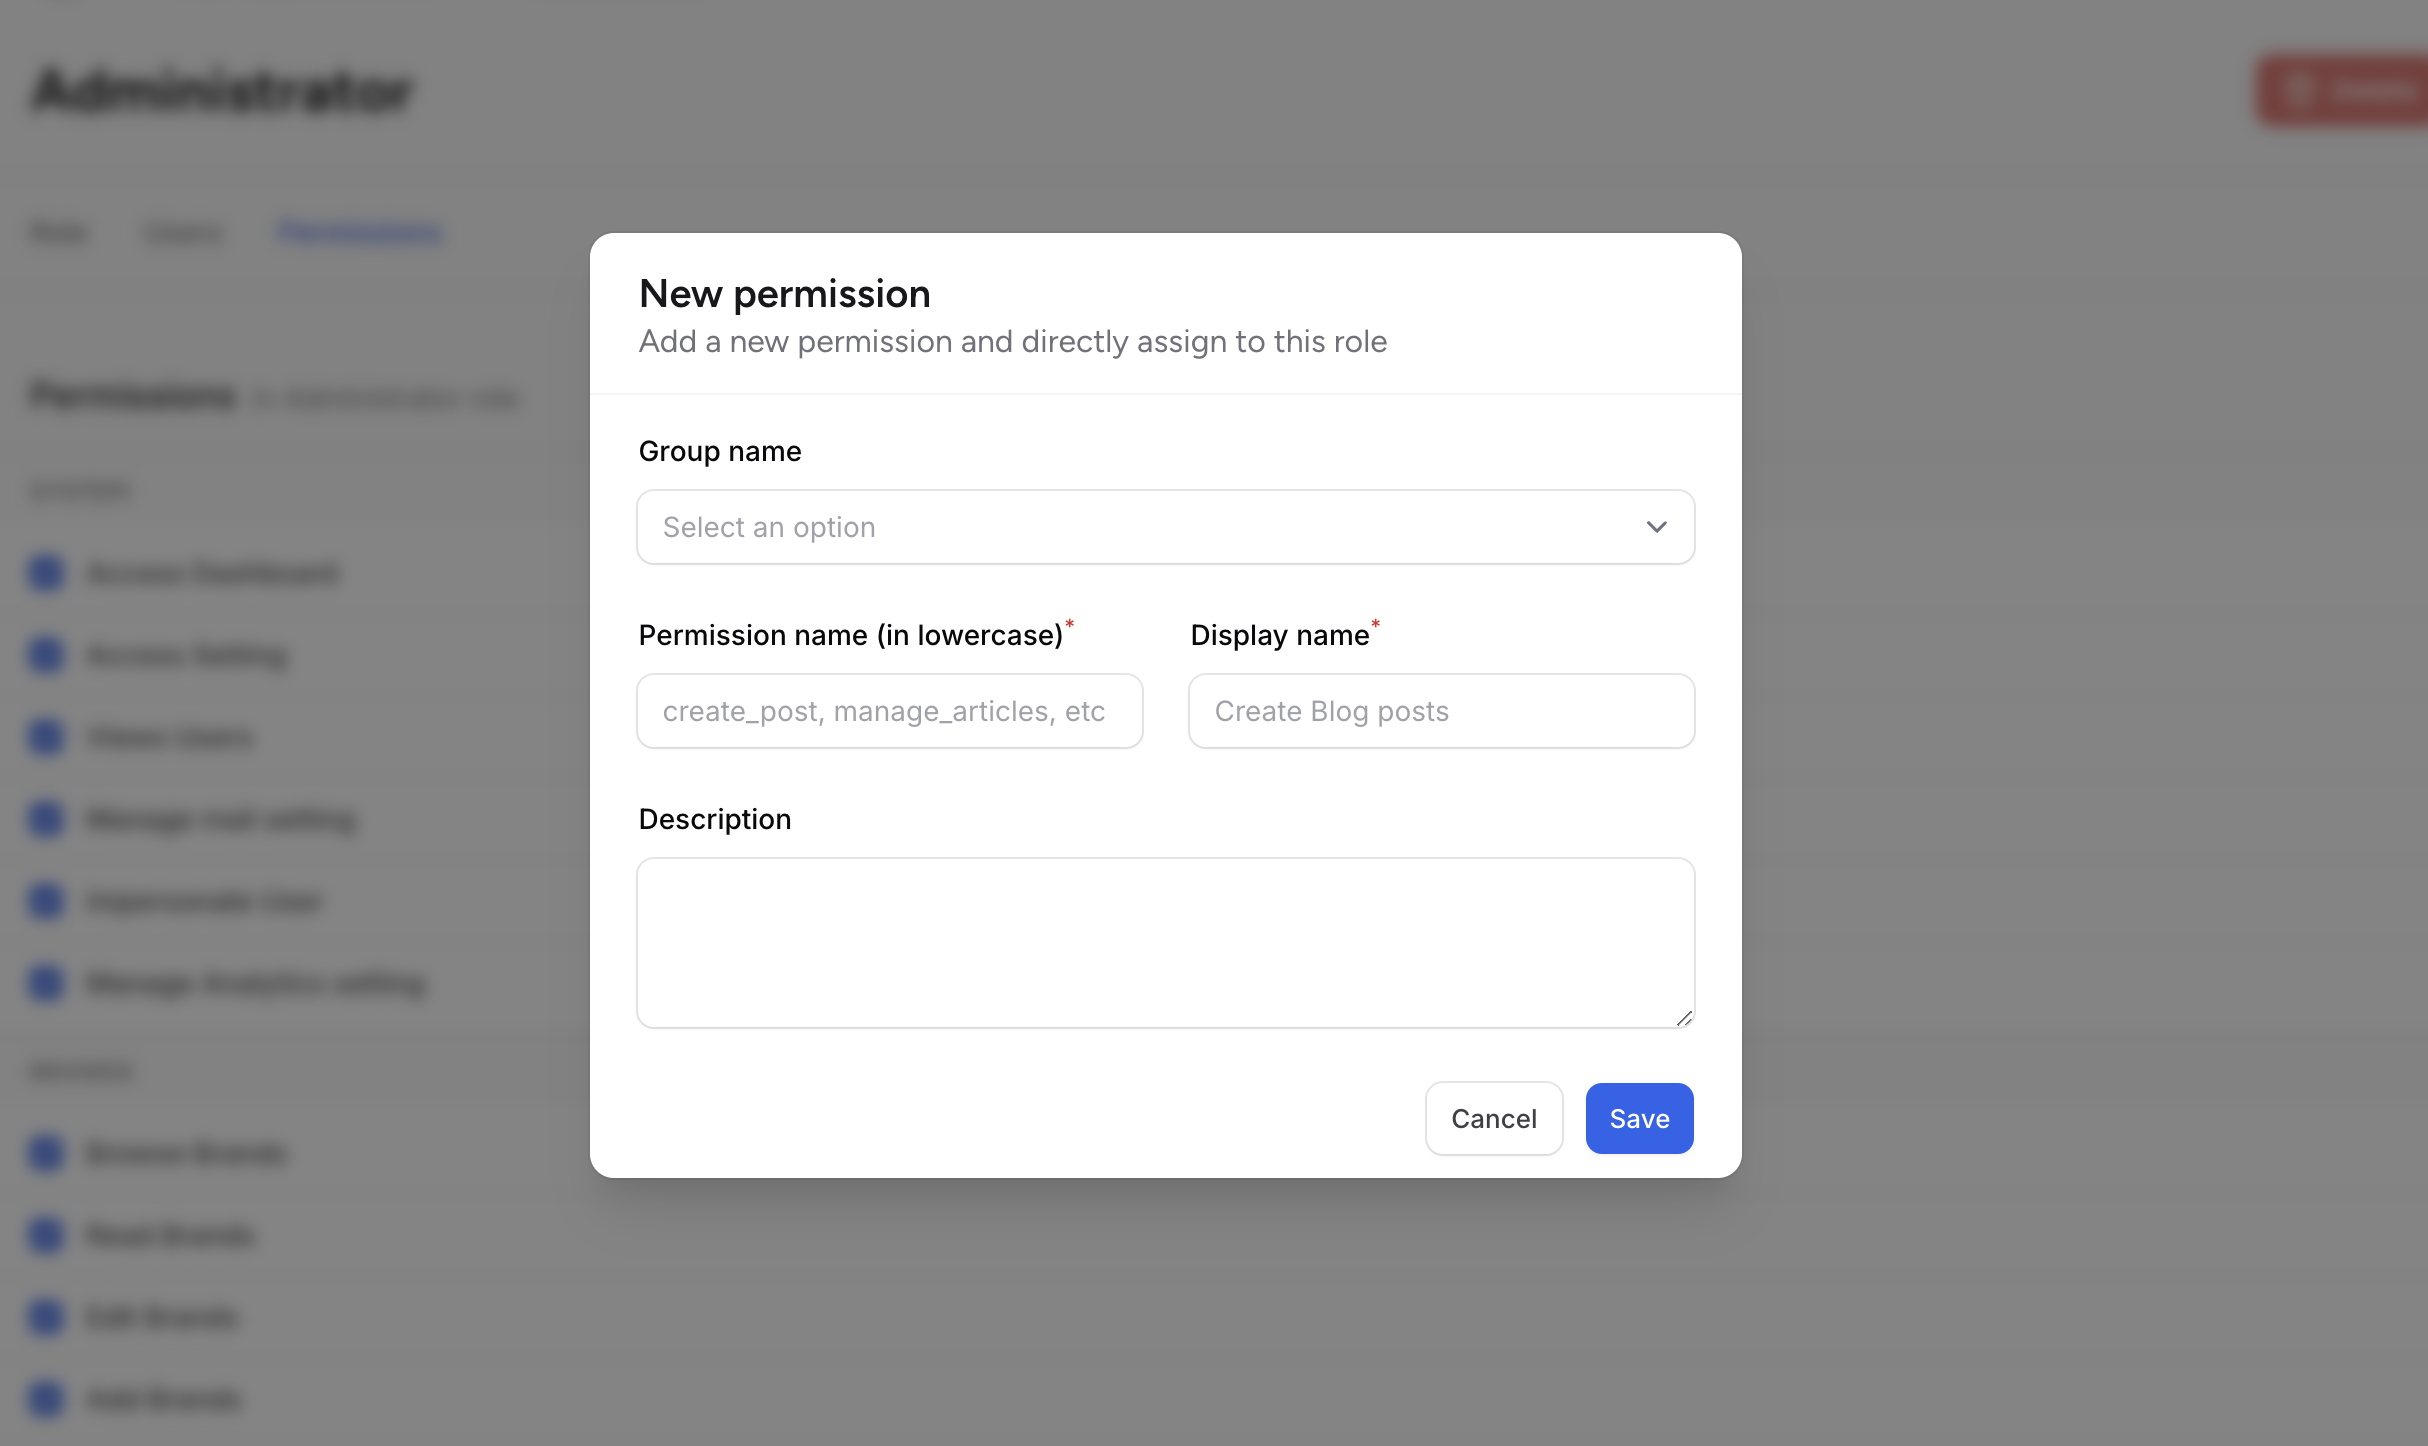
Create permission
Let’s assume that you would like to add a new permission to ACL. You will need to choose the role because every single permissions are linked to a role.
In the way that when an admin are granted of a specific role, he will granted all role's permissions.
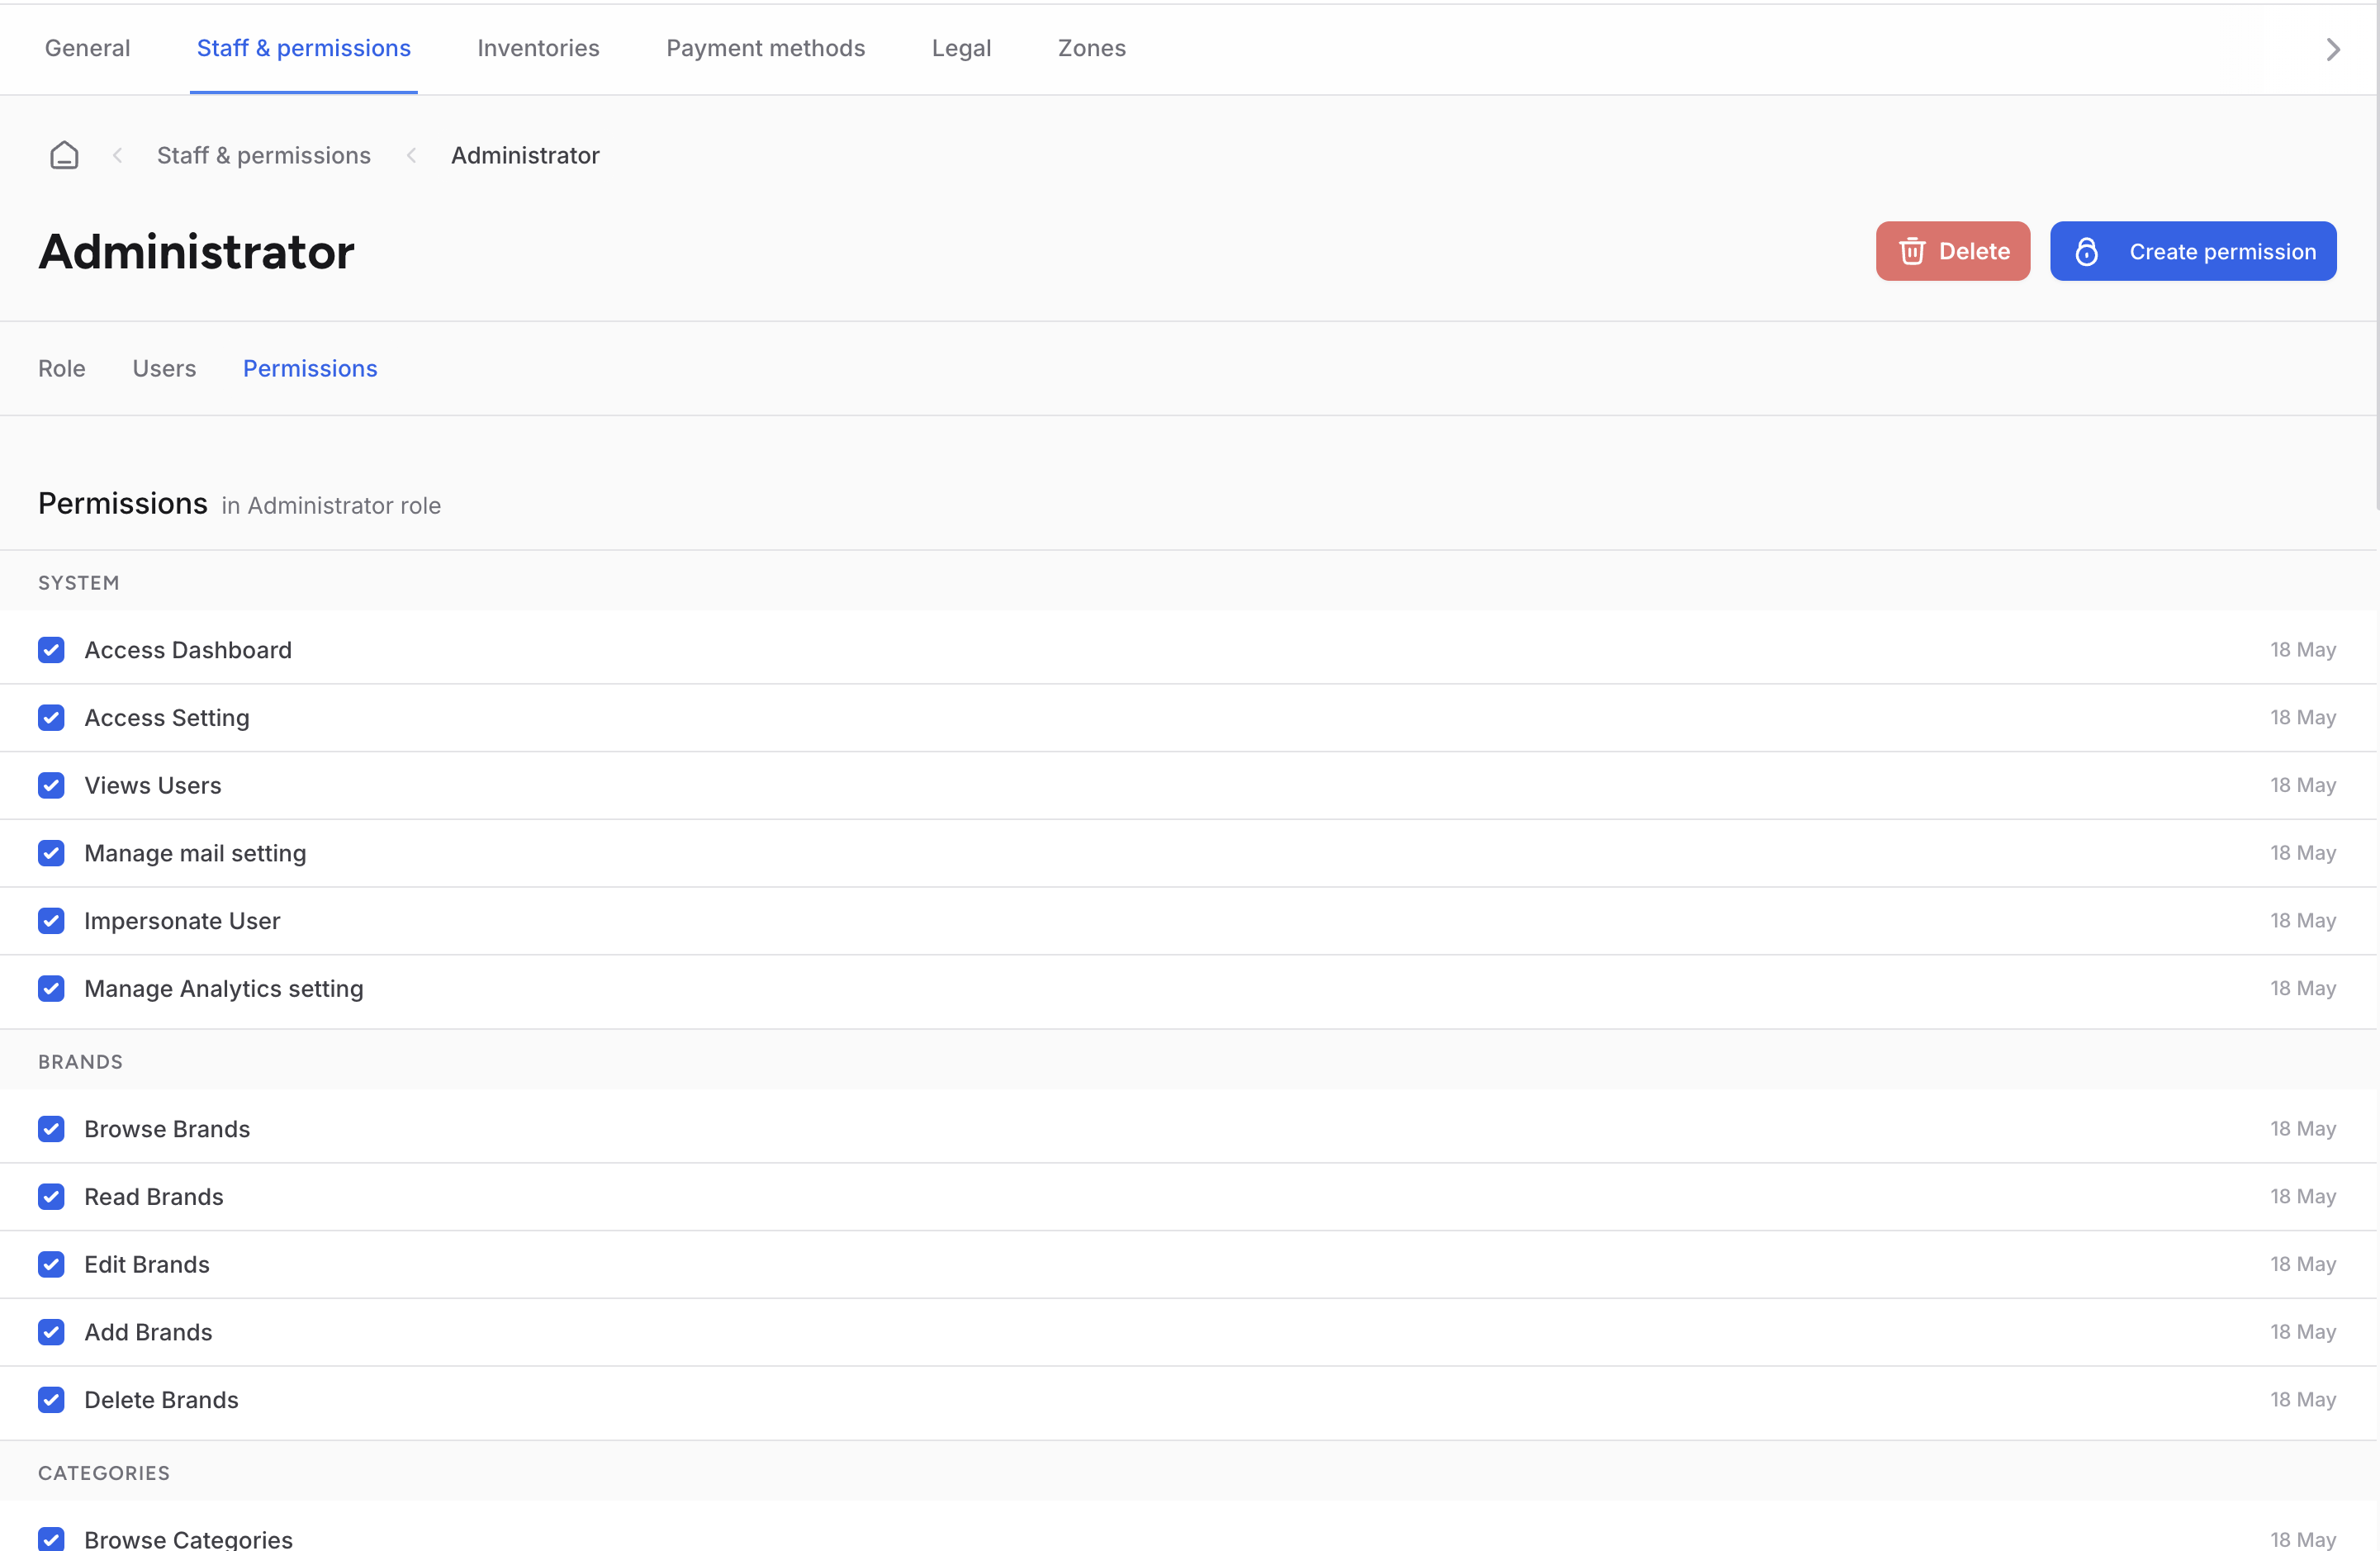
As you may have noticed all permissions are grouped by type, and the available types are mentioned above in this section.
To add a new permission you just need to click on the Create permission button.
After adding your permission it will be automatically associated with the role and therefore all administrators with this role will have this permission.
If the permission has no group it will be in a Custom permissions section.
